Signed in as:
filler@godaddy.com
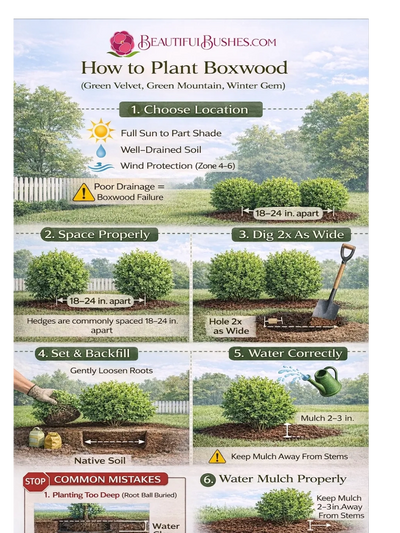
Boxwood prefer:
⚠️ Poor drainage is the #1 cause of boxwood failure.
If water pools after rain, improve drainage before planting.
For hedges:
Green Velvet is commonly spaced 24 inches on center. Dig the hole 2x as wide as the root ball
⚠️ Never plant boxwood too deep.
Boxwood roots need oxygen. Deep planting leads to decline over time.
Do not overpack soil.
After planting:
Soil should be moist — not saturated.
Mulch stabilizes moisture and protects shallow roots.
Boxwood can suffer winter burn.
To reduce risk: